Saturday, July 29, 2017

Saturday Step x Step - More Christmas in July

It is Cec here and today I am presenting the Saturday Step x Step.


Since the current challenge is Christmas in July I thought I would make something Christmas to share with you and this time it is another one of my ornaments.  These are really quite easy to make and can be made to look very simple or fancy, whichever suits your tree.  Let me show you how this one came together.


First I grabbed an old CD and got my husband to drill a hole in the top and the bottom, directly across from one another.  Then I cut two circles from the Graphic 45 paper called A Christmas Carol.  This time I just used a bowl to draw the circles and then fussy cut them because I didn't feel like dragging out my Cameo machine so they are slightly bigger than the actual CD.


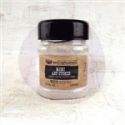
Next I glued the CD to the wrong side of one paper circle using Super Thick Slap it On (IndigoBlu) and then re-punched the two holes.  Note:  It is easier to open the holes in stages like this or you might not be able to find them once you add the other paper circle.


I adhered the other circle to the CD and punched the holes again. I didn't worry if the two paper circles lined up perfectly and when they didn't, I just used my scissors to trim them knowing the embellishments would hide any imperfections.


This time I decided to only decorate one side of the ornament because I wire all my ornaments to my tree and it won't spin.

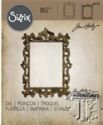
I started by dying some venise lace with Antique Linen Distress Ink and then attaching it to one side of the ornament. Next I did some stenciling with Aged Mahogany Distress Ink through a Poinsettia Mini Stencil from Tim Holtz set 19.


I die cut some poinsettia leaves using a Marianne Creatables die and paper from Graphic 45 St. Nicholas pad.  The petals were then shaped and layered.


Some "greenery" was die cut from the Tim Holtz Holiday Greens set and some scrap card stock.


I used my fingers to rub some Classic Treasure Gold wax paste on the edges of the poinsettia petals and the "greenery". I also added some to the outside edges of the ornament. To finish the poinsettia I added some seed beads in pearly white and gold to the centre.


Next I dyed some seam binding with Fired Brick and Aged Mahogany Distress Ink but it seemed a bit pink so I sprayed it with Aged Mahogany Distress Spray Stain and to get the depth of colour I was looking for.

To finish the ornament, I cut some little stamps from A Christmas Carol, inked the edges with Vintage Photo Distress Ink and added them in a row down the side. Next I folded the ribbon over and wound some wire around the top to hold it together and then added a button to hide the wire before I added that next to the stamps. The poinsettia was added next with the "greenery tucked underneath. I scattered some pearl stickers and gold gems around.

Finally I made a simple bead chain for the top and a more substantial one with dangles for the bottom. To attach them to the ornament, I looped some chain through the holes and used jump rings to attach the bead work.

I hope I have inspired you to get a start on your Christmas preparations.

Wednesday, July 26, 2017

Christmas in July

It is Cec here and I am your hostess for the current challenge. I am calling it Christmas in July! Here is what I have to say about it:

You might be experiencing summer heat but let's think cool by getting a head start on Christmas preparations. Your vintage or shabby chic creation could be a card, something to present a gift in or a decor item for the house or tree.

At the end of the challenge the team will choose their top four picks. Our first place winner will be invited to join us for a Guest Designer spot here at Frilly and Funkie. Three additional talented participants will receive badges to display on their blogs. Everyone who enters and adheres to the challenge guidelines will be entered into a drawing to win a $25 spending spree at The Funkie Junkie Boutique!

The guidelines for entering are simple; create a new vintage or shabby chic project following the challenge theme, link it below to your post (not just your blog) and include a link back to this challenge in your post. You can combine our challenge with up to 10 challenges (including this one) to be in with a chance of winning. If you are entering through a public forum (such as Instagram) you'll need to include the words Frilly and Funkie Challenge. Also, please be sure to turn off your Word Verification so our design team can leave comments on your blogs.

The girls on the Funkie side of the team share their wonderful Christmas-themed creations to give you some inspiration. To get all the details (and even a bonus project in one case) just click on their blog name and you will be taken directly there.

Sara Emily - sarascloset

Suzanne Czosek - Suzz's Stamping Spot

Jenny Marples - Pushing The Right Buttons


***************************************************
WEEK ONE

The girls on the Frilly side of the team are starting off with their fabulous Christmas-themed creations to give you some inspiration. To get all the details (and even a bonus project in one case) just click on their blog name and you will be taken directly there.

Kathy Clement - Kathy by Design

Autumn Clark - SewPaperPaint

Cec Wintonyk - CW Card Creations

Now that you have checked out their projects, I hope you are inspired to get a start on your Christmas and create something for the challenge because we sure would love to see what you come up with.

For even more inspiration check back tomorrow when our Guest Designer joins us and then next Wednesday the Funkie side of the team will be up with their makes.

Monday, July 24, 2017

Challenge Winners - In The Good Old Summertime

Welcome everyone, it's time again to announce our latest Frilly and Funkie winners. Thank you so much to everyone who took the time to enter our 'In The Good Old Summertime' challenge. The Design Team really enjoyed seeing the summertime inspired projects you created for this one.


This time we've chosen #13 JulD (JulD handmade) as our overall winner. We loved the level of detail and beautiful mix of textures in this tiny tin seascape. Congratulations to JulD on being our favourite for the 'In The Good Old Summertime' challenge and winning the opportunity to be a Guest Designer here at Frilly and Funkie for a future challenge.

And now for the three winners of our Frilly and Funkie Top 3 Badges; the choices are... #7 Lys #17 Lisa Hoel and #20 Shelly Hickox!!! Please email Linda at thefunkiejunkie@gmail.com for the codes for the Top 3 badges so that you can display them proudly on your blog.


And finally Random.org has chosen a lucky winner for the $25 gift certificate to The Funkie Junkie Boutique. Our congratulations this time go to #16 Beverly!

A big thanks from the Frilly and Funkie team to everyone who took part in this challenge and congratulations again to our winners. Once again, please email Linda at thefunkiejunkie@gmail.com for the codes for the winner's badge and to give us your email address for the Guest Designer details (JulD), for the Top 3 badges (Lys, Lisa and Shelly) and for the gift certificate details (Beverly).

Our current challenge, 'Christmas in July' runs through Tuesday, August 1st. We hope to see you entering this time around so that you too can be in with a chance to win. And don't forget to check out the inspiration from the Funkie side of the Design Team which will be shared on Wednesday, July 26th.

Have a great week everyone!

Friday, July 21, 2017

Friday Focus - Prima Marketing St. Tropez Collection


Hello, Friends! Autumn of SewPaperPaint here, and I am just so excited that it's time for a new Friday Focus at The Funkie Junkie Boutique! Not familiar with Friday Focus? This is our opportunity to share with you ideas, tips and techniques with a specific product or range currently available at The Funkie Junkie Boutique. For the next two weeks, all Prima Marketing St. Tropez products will be available for an additional 15% discount! I hope to share a project that shows the beauty and versatility of these lovely products.


I was super excited to work with an A4 paper pad. In the States, this size of paper us unusual and I was prompted to make a large scrapbook album to document my vacations this year. I'm sharing the details on construction and video on my blog, so join me today if you want to learn how to build a similar album.


There are several collage sheets in the collection and I used them to build multiple layers on each page. For my cover, I cut four Ornate Frame dies from thin chipboard and layered together to make a substantial focal embellishment. I used one of the collage images, an anchor charm and added some Mini Art Stones to mimic sand.

My dear friend suggested I make a closure from Jute, but I really wanted some sort of button closure. After days of contemplation an idea popped in my head. I glued jute in a circular design over a strung button. I pulled the strings through a hole I punched in the cover and secured. I added a loose jute string to the back to wrap around the button and am oh so happy with it.

Several of my pages have interactive elements, such as flaps which open to reveal even more photos. (The beautiful blue ribbon was from a little gift Linda includes in every package - what amazing customer service!)

The collage elements really speak for themselves and made it easy to create focal points.


The flap opens up to reveal even more collage and photo fun.


I tucked in a lot of dies, like the new Tim Holtz Scroll die, which were cut from the paper pad and sponged for contrast.


The little stamp set is so much fun and I loved mixing it with the various elements.


The Belle Isle flowers are dainty enough to work inside the pages. I layered them with flat flowers from my stash for extra impact.


All of my pages were made of kraft stock and the designer paper was stitched on top.  


One of my favorite products in this collection is the gemstones. They have so much color variation and light movement like real gems! I tucked them in where ever I could. :)


I just love the many "vintage" style graphic elements.


I cut tags from the papers and tucked them in everywhere.


This is my favorite collage, including the Tropical dies by Tim Holtz.


And the opposite page with another flipout and stamping.


One of my photographs of the Atlantic Ocean inside.


There are so many varied patterns, like this cabana stripe. I love the eclectic look.


I kept my layers relatively flat, but the binding method allows for a little bulk, like chipboard from my stash.


I have a flip through video on my blog if you're interested.


You can make this entire album with one paper pad! Grab a few embellishment packs to go along with while they are on sale.


I cannot believe I was able to produce so many collages from one pack of paper!


I ended the album with a waterfall and will have to wait until next year to finish that page, because I ran out of photos! But I know I will cherish this album for years to come. I truly hope you are inspired and will take a look at the Prima St. Tropez collection in the shop.


Here are the products I used, many of which you may already have. Happy summer and happy shopping!  Hugs, Autumn