It's Linda, the Funkie Junkie, here this week to share a sweet Mother's Day frame. This was such a fun project to make! I wanted to make it very girly and retro so I set out to make a chintz fabric type of background using a Wendy Vecchi Stamp It, Stencil It image. And don't forget, you can double click any image to get a great close up.
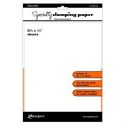
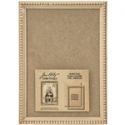
Step 1. The finished background piece is to be matted on a Tim Holtz Idea-ology Framed Panel. Cut a piece of Ranger Specialty Stamping Paper 6¼ x 8½ inches to fit the frame.
Step 2. Create a multi colored background by misting the Specialty Stamping Paper with rubbing alcohol and then dripping a few drops of Wendy Vecchi Leaf Green Archival ink from a reinker onto the surface. Spread the ink around the surface with a palette knife. Dry with a heat tool and watch the magic happen.
For this project, you don’t want to get your background too deeply colored. It should be kept fairly light so the stamping will take center stage.
To create a second layer, once dry, spray again with rubbing alcohol, drip on a few drips of Pink Peony Archival Ink and distribute with a tool. Heat this layer with a heat tool and your background will be finished.
 |
| Check out the details with a double click. |
Step 3. Stamp the floral stamp From Wendy's Bouquet Stamp It Stencil It using Jet Black Archival Ink in a random pattern. Be sure to heat set your archival ink before going on to the next step. Archival Ink takes a few minutes to dry on Specialty Stamping Paper. It’s best to heat set it to avoid smearing. It’s also important to note here that the background (Step 2 above) using the rubbing alcohol must be done before stamping with archival ink. If you stamp first, the alcohol will remove the archival ink stamping.
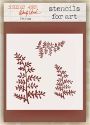
Add an extra pattern to the background. Use Leaf Green Archival Ink to stencil the Fern stencil using the Mini Ink Blending Tool. Heat set your stenciling.
 |
| Zoom in for details by double clicking. |
Step 4. Using the stencil that came with the Bouquet Stamp It Stencil It, stencil on Leaf Green Archival Ink using a Mini Ink Blending Tool. Each time a leaf is stenciled, apply Ranger Clear Embossing Powder over the wet archival ink and heat on. Repeat process with the flowers, stenciling them with Pink Peony Archival Ink and then clear embossing. Archival ink works great as embossing ink and embossing gives your project a little extra boost of texture and dimension. Embellish the flower centers with Wendy Vecchi Sunflower Enamel Accents.
 |
| Check out the details close up with a double click. |
Step 5. Using the Wendy Vecchi Checkerboard stencil, stencil Pink Peony archival ink onto white card stock with the Mini Ink Blending tool. Remove stencil and wipe off excess ink, reposition one square over so the white squares show. Stencil on Leaf Green Archival Ink to create a checkerboard of pink and green. This will be the background for your letters.
Step 6. Die cut 3/4” letters for Happy Mother’s Day. For this project, the Tim Holtz Decorative Strip Die Chip Block was used. Apply Tim Holtz Distress Embossing Ink to the letters by pushing the letters face down into the pad. Apply Wendy Vecchi Violet Embossing Powder to each letter and heat emboss.
Affix letters to strips of the checkerboard paper to spell out Happy Mother’s Day. Embellish strips with Leaf Green Enamel Accents. Reinforce sentiment strips by adhering a piece of chipboard to the reverse side. Use Ranger Black Foam Adhesive to mount and to add dimension.
 |
| Zoom in by double clicking. |
Step 7. Give the frame a distressed look by painting it black with Tim Holtz Black Soot Distress Paint. When dry, paint on Distress Embossing Ink with a paint brush and emboss with Wendy Vecchi Violet Embossing Power. Apply to one side of the frame. Tap off and return the excess powder to the jar. To give it a distressed look, lightly rub off some of the embossing powder so some black shows through. Discard embossing powder that was rubbed off. Don’t mix it with the good embossing powder as it may be clumped from being exposed to the embossing ink. Heat emboss each side and let cool before going on to the next side of the frame. Repeat this process with the sides of the frame base to which the card stock will be applied. You want a uniform color between the frame and the sides of the base.
 |
| Want to see details? Just double click. |
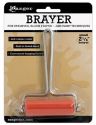
Step 8. Affix the card stock to the base by brushing on a moderate coat of Distress Collage Medium and quickly applying the cardstock. Flatten it down with a clean brayer to make sure there are no air pockets. Run a thin bead of Distress Collage Medium around the back of the frame and affix to the base. Weight it down with heavy objects and let dry.
 |
| Zoom in with a double click on image. |
Step 9. Handmade florders - stain one sheet of white card stock with Pink Peony reinker and one with Violet reinker. Spray or pour rubbing alcohol onto craft sheet, drip and swirl one color of ink in alcohol and lay cardstock face down into it. Dry and repeat if you want more color. Do the same with the other sheet of card stock using the Violet ink. Cut pink and violet flower layers from stained card stock using the new Tim Holtz Small Tattered Florals die. Scrunch up the layers, flatten back out and assemble layers into flowers. Stain more white card stock with Leaf Green archival ink and cut with Spring Greenery Decorative Strip die. Embellish with Leaf Green Enamel Accents. Affix to frame to embellish.
Thank you so much for stopping by! I hope you like my Mother's Day project. All the products used are listed below. They are available at 20% off list at The Funkie Junkie Boutique.


What a charming floral frame, Linda. I really love the weathered finish on the frame itself - such a clever technique with the embossing powder.
ReplyDeleteAlison x
Linda, this is so lovely and has such a wonderful vintage vibe. You chose the perfect color palette, and as usual, every detail is perfection. I love the inky background, too!
ReplyDeleteWow, Linda! What a wonderful step out post and the results of your framed artwork are magnificent! I love the way you have finished the frame and the background is gorgeous! I'm going to have to give these techniques a try. Thank you for the inspiration! Hugs!
ReplyDelete