

Hello friends and welcome, Zoe here and I'm delighted to be hosting this Saturday step by step. This time I've cooked up a travel inspired card, incorporating the current challenge theme "Count Me In" with a dash of numbers and the Friday Focus with a sprinkle of Emerald Creek embossing powders. Here's the recipe...

(click on each set of images for a closer look)
Step 1: Die cut a globe from manila heavystock using the Tim Holtz thinlits globe die.
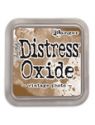
Step 2: Blend in vintage photo distress oxide to the land portions of the globe.
Step 3: Press a distress embossing in pad over the globe and then cover with Emerald Creek fractured ice embossing powder.
Step 4: Melt the powder with a heat tool and then check out the cool reaction between distress oxide and fractured ice embossing powder...

When the powder melts it reacts with the distress oxide and you get this incredible marbled liquid!

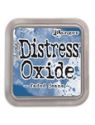
Step 5: Blend faded jeans distress oxide into manila heavystock with a mini blending tool.
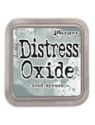
Step 6: Blend iced spruce distress oxide lightly over the top.
Step 7: Blend vintage photo distress oxide into the edges.
Step 8: Give a generous spritz with water using a distress sprayer bottle. Dry with a heat tool.

Step 9: Rub vintage photo distress oxide onto a non stick craft mat and spritz with water so that droplets form.
Step 10: Take the heavystock background and gently tap parts over the droplets. Dry with a heat tool.
Step 11: Die cut a stitched frame from manila heavystock.
Step 12: Tap distress embossing ink over the frame and cover with hammered metal embossing powder by Emerald Creek. Melt with a heat tool.

Step 13: Run a tiny piece of scor-tape over the edges of the heavystock background and rip off to create small tears.
Step 14: Blend vintage photo distress ink over the tears and mount onto metallic kraft stock. Sand the edges and blend with vintage photo distress ink as before.
Step 15: Trim the edge of the globe die cut. Use a guillotine or craft knife as a paper trimmer may snag on the delicate pieces of the die cut.
Step 16: Tuck the globe slightly under the frame and adhere with glossy accents.

Step 17: Sand some idea-ology classic kraft stock, blend in a little vintage photo distress ink and mount to a card.
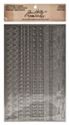
Step 18: Trim the edge of an industrious border sticker and adhere to the top of the black kraft stock.
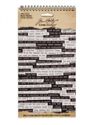
Step 19: Sand the edge of a small talk sticker and blend in vintage photo distress ink.
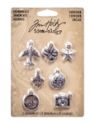
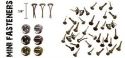
Step 20: Tie natural cotton string around a mini fastener.

Step 21: Pierce holes in the globe and push the mini fastener through. Push a second mini fastener into the globe and run the string from the first fastener to the second and wrap around once, then push the mini fastener down fully and secure at the back. Repeat with a third mini fastener, this time tying a knot and then pushing through the globe and securing. You could use this to indicate a specific route for a holiday or trip.

Step 22: Paint parts of an idea-ology adornment airplane with ruby heavy body paint by Dina Wakley. When almost dry, rub some of the paint off.

Step 23: Adhere the airplane to the edge of the frame with glossy accents. Add numbers to the inside of the globe with idea-ology special delivery remnant rubs. Again you could use numbers that are memorable to a trip or mark the date.

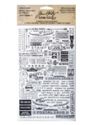
Step 24: To create the postcard header, rub remnant rubs from the special delivery set onto white cardstock, fussy cut and adhere with scor-tape.

Step 25: Adhere the small talk sticker to the footer of the card. Cover with a layer of glossy accents and set aside to air dry.

I hope you have enjoyed the step by step. Be sure to pop over and take a look at the
current "COUNT ME IN" challenge and Friday Focus.
Have a great weekend.
Zoe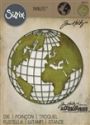 | 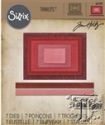 | 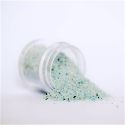 | 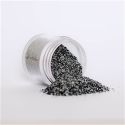 |  |
 |  |  |  |  |
 |  |  |  |  |
 |  |  |  |  |
 |  |  |  |  |

Love it! I just got the globe die and you've given me some ideas on using it. Thank you for sharing!
ReplyDeleteThink this has to be one of my most favourite things of this year Zoe!!! The way that Fractured Ice combines with the Distress Oxides is unbelievably cool. I adore each of those distressed metallic layers and adding that altered plane charm and the longitude/latitude numbers is just the best! You are one clever lady - thank you for sharing xx
ReplyDeleteThe detail in this is just incredible! I was playing with Fractured Ice yesterday, and I'm in love with it. What a wonderful tutorial. Thank you!
ReplyDeleteSuper tutorial, Zoe. I didn't know about the EP reacting with the Oxide ink. That is very cool. Your card is fantastic. Love all the details with the Remnant Rubs!
ReplyDeleteOut of this world....love it!
ReplyDeleteJust love the style of this spectacular card! You have totally inspired me to experiment with the oxides and embossing powders. Such an amazing piece!
ReplyDeleteWOW! I am in awe and love the way the powder worked with the oxides. All of the details here are fantastic and I love the added touch of the markers and string (one was for your plans to come to Canada, right?!)
ReplyDeleteThis piece is absolutely amazing Zoe! Love that reaction between the Distress Oxide and the embossing powders! Perfection!
ReplyDeleteAwesome step by step Zoe! Love the globe!
ReplyDeleteFabulous Tutorial and now cool is that embossing powder when added to the Oxides, wonderful finish. Adore the added string and the numbers . Very clever piece of work, love it. Tracy x
ReplyDeleteWow! The effects you created are amazing. Love it Zoe!
ReplyDeleteoh, this is soooooo cool!! luv
ReplyDeleteA great tutorial Zoe, I just have to keep going back to see how the EP reacted with the Oxides - it looks amazing! Loving the altered airplane too! Anne x
ReplyDeleteThe recipient of this card is one lucky girl or guy. If it came to me, I would frame it to keep on display.
ReplyDeleteZoe, the step by steps are completely clear and informative. Love the way you did them. The card...oh my goodness!!!! The card is amazing. I have this die and really want to run to my artsy table and get creating. Thank you for this wonderful design idea and techniques.
ReplyDeleteWhat a fabulous project and thank you for the step by step tut. Such a lovely idea for the oceans. I must add some Oxides to my stash and that EC EP, love the S/FX!
ReplyDeleteWhat a fabulous project and thank you for the step by step tut. Such a lovely idea for the oceans. I must add some Oxides to my stash and that EC EP, love the S/FX!
ReplyDeleteWhat a gorgeous card! Right up my street. Great tutorial too x
ReplyDeleteFABULOUS! Just found your blog and designs!
ReplyDelete